Analysis Profile
Summary
Use Analysis Profile to automatically evaluate vulnerabilities in your firmware analysis. Define the rule-based logic using the ONEKEY Query Language (OQL); automatically perform vulnerability assessment and add comments. Drag and drop rules to change the order in which they run.
As firmware analyses grow, manually triaging every detected vulnerability becomes repetitive – especially when the same decisions apply across multiple firmware versions or product lines. Analysis Profile solves this by letting you define reusable rules that automatically apply consistent assessments every time an analysis completes.
You can also use rules to encode company-wide triage policies or product-specific threat models. For example, you can set up rules to ignore all withdrawn CVEs or LOCAL attack vectors.
Rules run automatically after each analysis and can also be triggered manually on existing firmware. They complement Vulnerability management: any field you can set manually can also be set by a rule.
Note
Rules are written in OQL (ONEKEY Query Language). Familiarity with it is strongly recommended for setting up complex rules.
Writing rules
Click Configuration in the top menu bar and select Analysis Profile to access this function.
Info
The Admin, Manager, Analyst, and Observer user roles can view Analysis Profile rules. Only Admin, Manager, and Analyst can create, edit, or apply rules.
You can set up rules for security issues and CVEs separately on their respective pages.
Rules are evaluated from top to bottom: the bottom-most rule overrides earlier ones that affect the same vulnerability. Place generic rules at the top and specific rules at the bottom, so the specific ones take precedence.
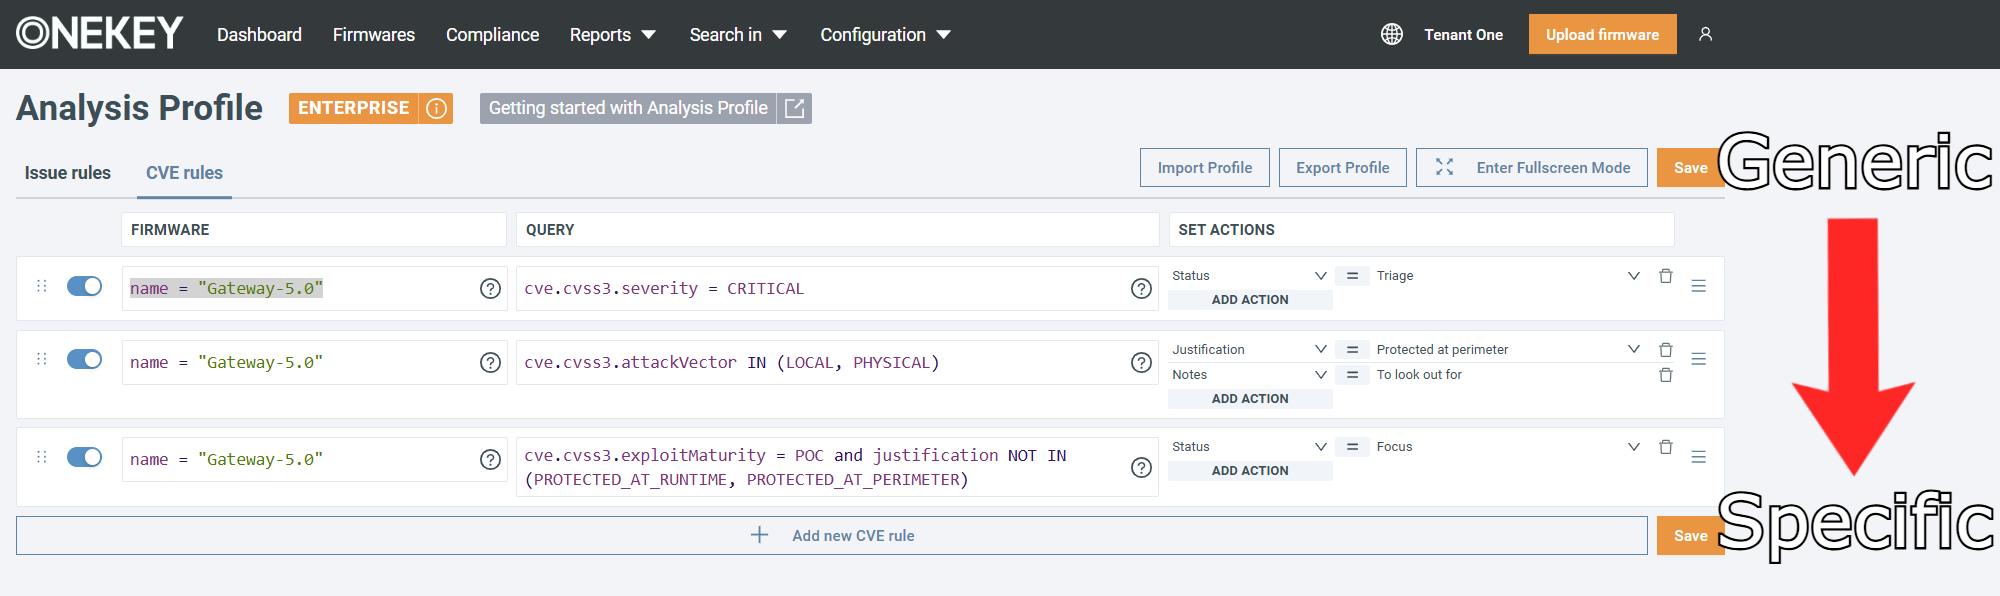
- In FIRMWARE use Firmware OQL fields to match on specific firmware.
- In QUERY use Issue or CVEMatch OQL fields (depending on the tab you are on) to match on specific vulnerabilities.
- In the SET ACTION field, define the action the rule should take. Each rule must have at least one action.
Warning
Your edits are only kept once you save, so don't forget to save before leaving the page. If two people edit the rules at the same time, the last save overwrites the other's changes – edit one at a time, and reload the page before editing.
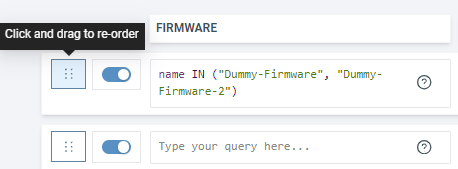
Drag and drop the rules to change their order:
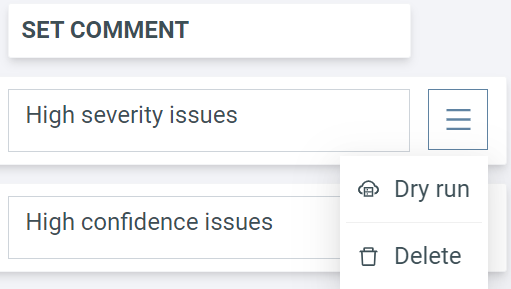
To test a rule, click on the rule menu and select Dry run. To delete a rule, click on the same menu and select Delete.
For a practical example of using Analysis Profile, see Filtering out non-relevant CVEs.
Note
You can temporarily disable rules with the left-hand toggle.
Applying rules
Analysis Profile rules are applied automatically once an analysis finishes successfully. This can be after an upload, a monitoring run, or a manually triggered analysis.
Alternatively, you can apply rules manually:
- Select the Firmwares tab.
- Click the checkboxes next to the firmware images to which the rule should be applied.
- Click Apply analysis profile in the top-right corner.
When an analysis completes, the platform first runs Automated Impact Assessment, which scores each vulnerability and puts low-scoring CVEs in the Not affected status. Analysis Profile rules run after this step.
Cascading rules
When a rule updates an assessment field, subsequent rules operate on the updated value.
An example:
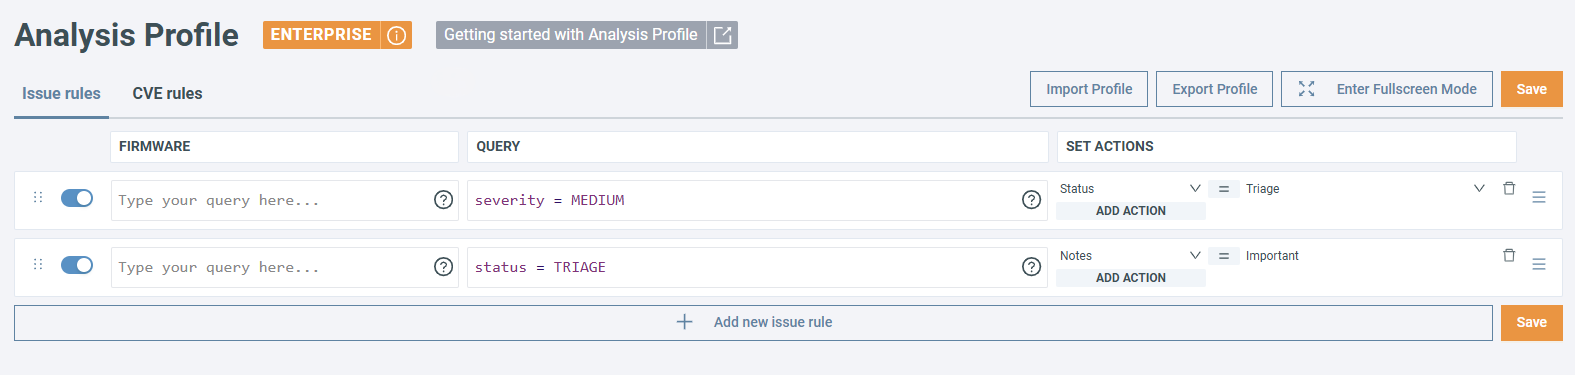
- The first rule sets the status of all CVEs with a match score above 20 to
TRIAGE. - The second rule adds a note saying 'Escalate' for every
CRITICALCVE in theTRIAGEstatus. - Because the first rule is evaluated before the second, the note is also added to the critical CVEs affected by the first rule. The non-critical CVEs keep the
TRIAGEstatus but receive no note, as the second rule does not match them.
Note
Dry run evaluates a single rule's query against the current analysis data in isolation. It does not simulate the rules that run before it, so cascading changes from earlier rules are not reflected. The cascade only takes effect when the rules are applied to the analysis.
Audit Trail
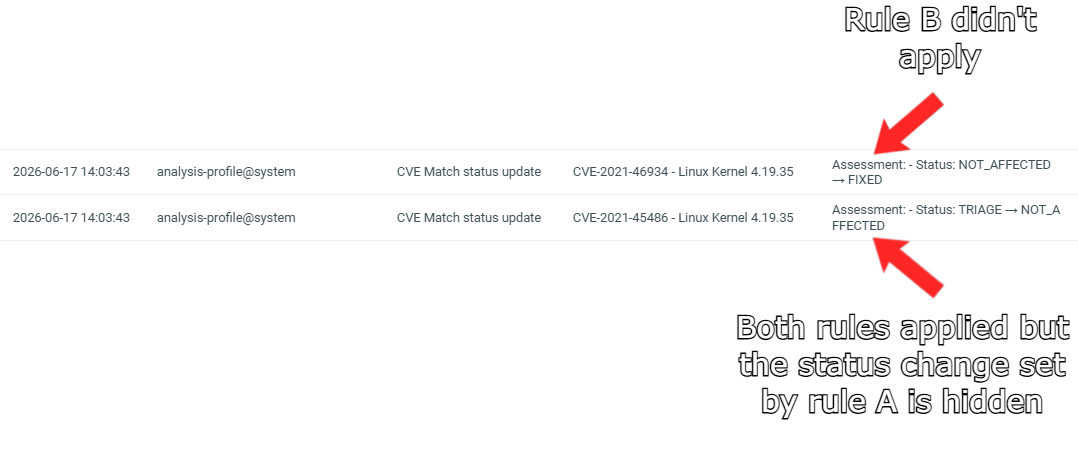
When a vulnerability is affected by multiple rules, the platform records one Audit Trail entry that captures only the final change. For example, if a generic rule (rule A) sets a CVE’s status to Fixed but a later rule (rule B) changes it to Not affected, only the Not affected status leaves a trail.

Fields
FIRMWARE
Select the firmware where the Analysis Profile rule should run. If you do not specify a firmware, the rule applies to all firmware.
To select a single firmware, use the name OQL field with the = operator:
To select multiple firmware, use the name OQL field with the IN operator:
QUERY
Select a specific group of issues or CVEs. Use Issue OQL fields on the Issue rules tab, and CVEMatch OQL fields on the CVE rules tab.
For example, to select all high severity issues, click Issue rules and use the following OQL:
To select all CVEs without an assigned status, make sure you are on the CVE rules tab and use:
SET ACTION
Specify which vulnerability assessment field to update with the rule. You can update any field available through manual vulnerability assessment.
Set action fields
Status: Sets the triage status, such as Triage, Not affected, or Fixed. See Assign a status.
Justification: Records the VEX justification for the selected status; it is only relevant for certain statuses. See VEX.
Vendor Response: Records the vendor's response to the vulnerability, such as UPDATE or WILL_NOT_FIX. See VEX.
Notes: They are associated with the vulnerability and can be automatically updated by Automated Impact Assessment; they do not appear in the Audit Trail unless a change has been made.
Comments: They appear exclusively in the Audit Trail and are not linked to the vulnerability itself – they are to explain why an update was made. They can be added manually or set automatically by Analysis Profile rules.
Severity: Overrides the severity that was assigned from the CVSS score. If the same rule also sets the Environmental CVSS, the explicit severity takes precedence. See Severity override.
Environmental CVSS: Sets the CVSS Environmental score, which recalculates the vulnerability's severity automatically. It requires an existing base CVSS score. See Environmental CVSS.
SSVC: Records an SSVC decision. SSVC is a separate prioritization framework and does not affect the severity. See SSVC.
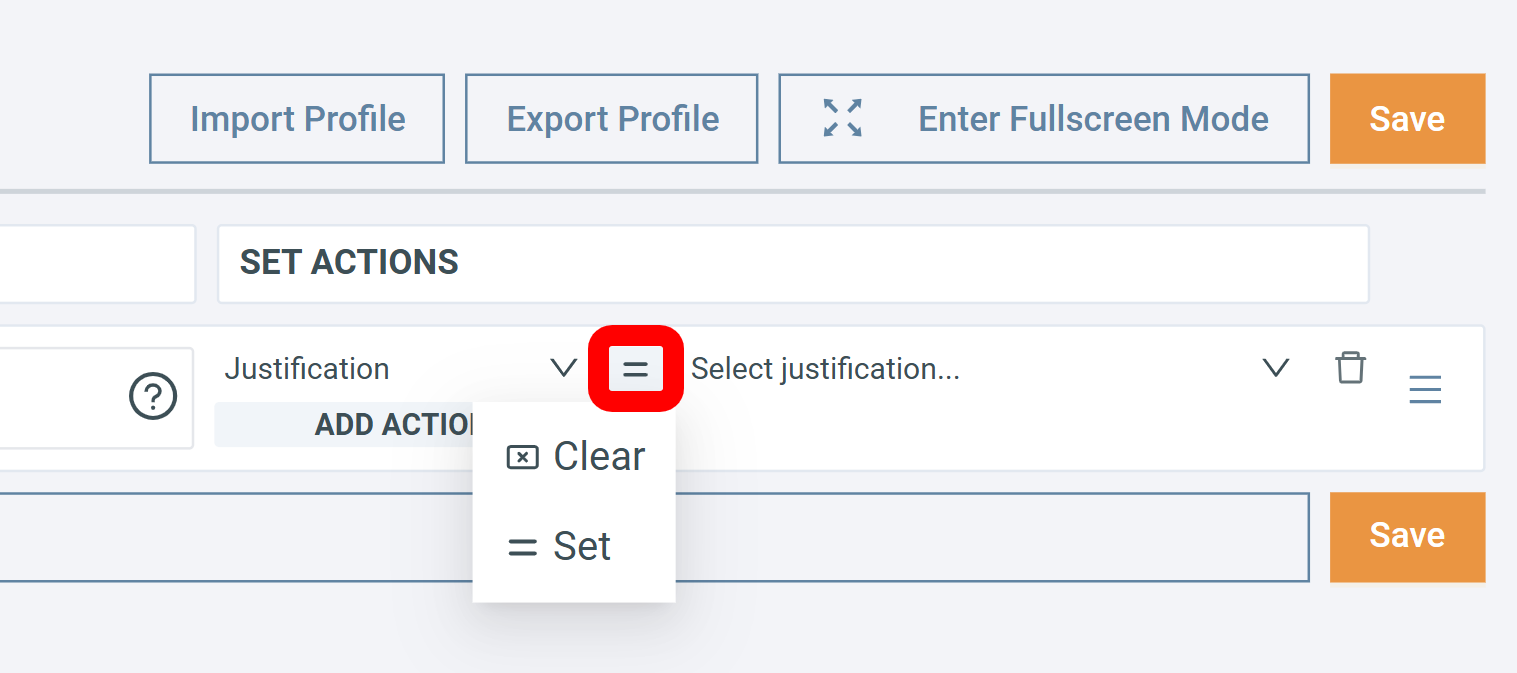
By default, each action uses the Set mode, but some actions support additional modes. Click to choose a different behavior:
Special action modes
Clear: Remove the existing value.
Available for: Justification, Vendor Response, Notes, Environmental CVSS, CVSS, SSVC
Append: Add your note alongside existing content.
Available for: Notes
Increase: Increase the ranking (e.g., MEDIUM → HIGH).
Available for: Severity
Decrease: Lower the ranking (e.g., MEDIUM → LOW).
Available for: Severity
Analysis Profile rules cannot override assessments that were set manually. You can, however, manually override any assessment that was set by a rule. Both updates are recorded in the Audit Trail.
Import/Export rules
Click Export Profile to download your rules as .csv – CVE and Issue rules are exported as separate files. Click Import Profile to upload a file and choose whether to replace your CVE or Issue rules. Invalid files are rejected with an error.
To create a custom file, start from an exported one as a template.
Important
Importing a .csv file overwrites all current rules of the selected type.
Set a rule while changing an assessment
To make it easier to set new rules for Analysis Profile, you can define a rule directly while assessing vulnerabilities:
- Check the box next to an issue or CVE.
- Click on the Set assessment button.
- In the popup, complete the assessment.
- Click Save changes & create analysis rule.
- Complete the rule using OQL or by selecting items under the Firmware and Query sections.
The newly created rule will appear at either the top or bottom of your Analysis Profile page, based on the selected sorting setting. Later you can modify it like any other rule.
Quick reference
| Feature | Details |
|---|---|
| Rule order | Rules run top to bottom; the bottom-most rule takes precedence if multiple rules affect the same vulnerability. Place generic rules at the top, specific ones at the bottom. |
| Cascading rules | Each rule operates on the results of earlier rules – a later rule sees the values that earlier rules set. |
| Scope | Rules apply to all firmware by default. Use the FIRMWARE field to restrict a rule to specific firmware. |
| Automatic trigger | Rules run automatically after every completed analysis – whether from an upload, a monitoring run, or a manually triggered analysis. |
| Manual override protection | Rules do not override assessments that were set manually. Manual changes always take precedence over rule-assigned values. |
| Import/Export | Export and import rules as .csv. Importing a file overwrites all current rules of the selected type. |
| Create rule from assessment | Define a new rule directly while triaging vulnerabilities using Save changes & create analysis rule. |
| Audit trail | Rules record one Audit Trail entry per vulnerability, capturing the final change. |