Use filters
Summary
Firmware analysis often produces thousands of CVEs, which can make it difficult to navigate them. This guide explains how to use filters and Automated Impact Assessment to manage and prioritize results effectively.
Basics
You can use filters in most datatables – such as Security Issues, CVEs, Components, and Files. The basic approach is the same for each table.
You can filter according to your current data columns.
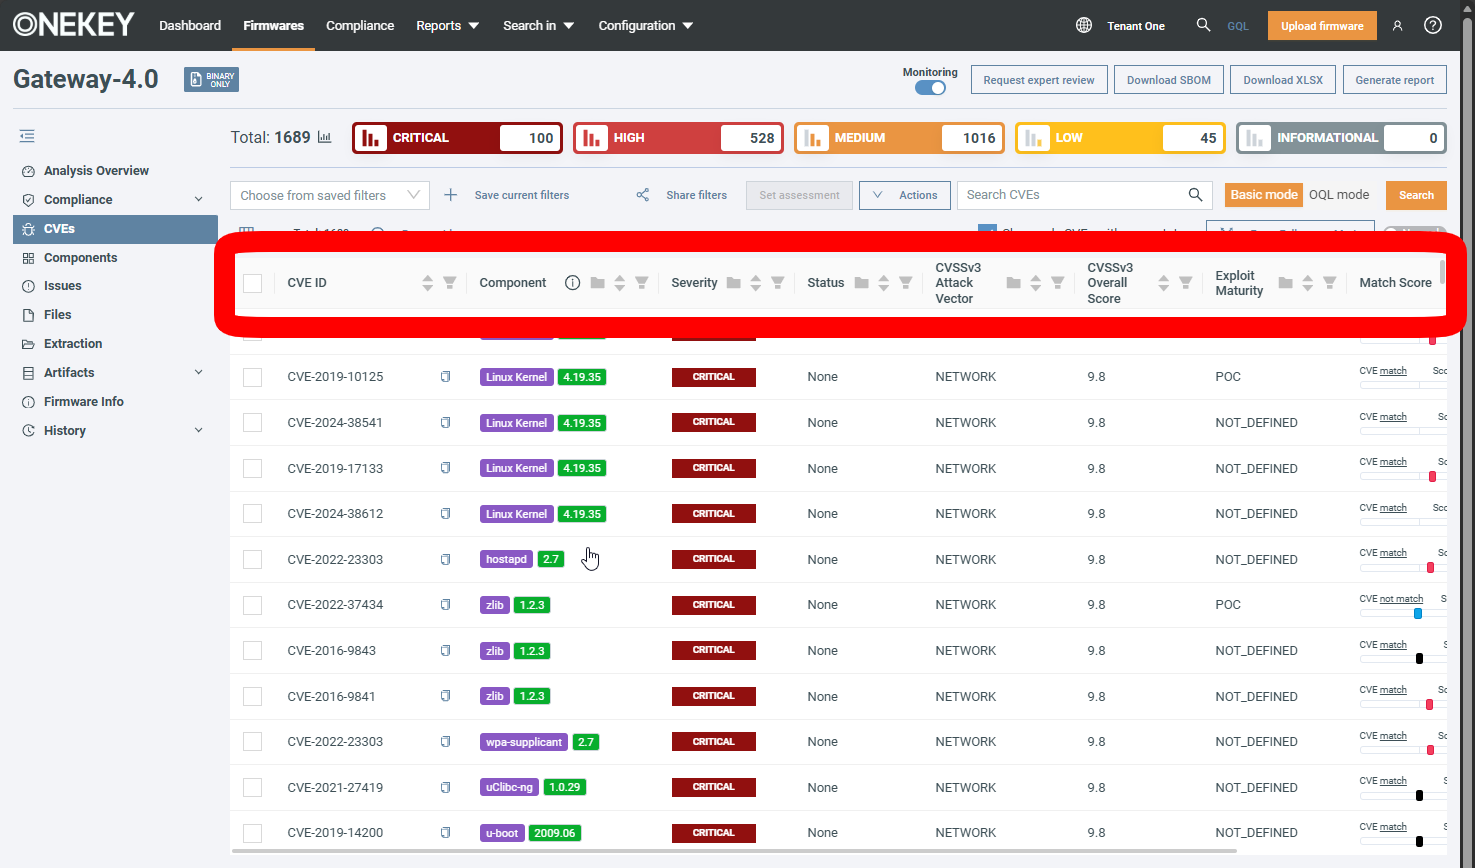
Click next to a column name to apply a filter. Depending on the data type, you might have to select from a list, provide your custom filter, or choose from a range.
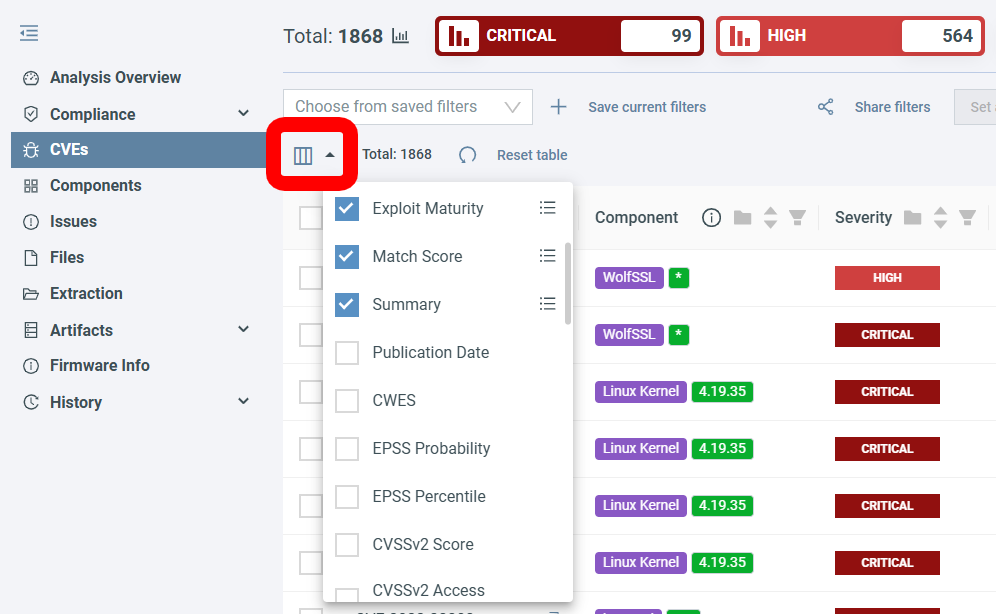
To add/remove data columns click :
Click Reset table to go back to the default state.
Show only CVEs with open status
This feature is enabled by default and significantly reduces the number of CVEs you have to triage. By checking this box, you show only CVEs that are in one of the open statuses.

CVEs that are determined to be not exploitable in the context of the firmware are automatically assigned the closed status Not affected and are hidden from the table. See Automated Impact Assessment to learn more.
Some helpful filters
-
CVSSv3 Attack vector
Attack Vector measures how remote an attacker can be to exploit a vulnerability, with values ranging from:
- Network – Exploitable over the Internet
- Adjacent – Same local network
- Local – Requires local access or user interaction
- Physical – Requires physical access to the device
Usable in: CVEs and security issues tables
Example scenario
You want to prioritize vulnerabilities that could be exploited remotely over the Internet, as these pose the highest immediate risk compared to vulnerabilities requiring physical access.
-
EPSS Percentile
EPSS (Exploit Prediction Scoring System) Percentile indicates what percentage of all CVEs have an equal or lower probability of being exploited in the wild. For example, a vulnerability in the 95th percentile is in the top 5% most likely to be actively exploited by attackers.
Usable in: CVEs table
Example scenario
You have limited patching resources, so you filter for CVEs above the 90th EPSS percentile to focus on vulnerabilities that are being actively exploited.
-
Status
Status tracks the triage state of vulnerabilities, organized into open statuses (Triage, Focus, None) and closed statuses (Accepted risk, Deferred, False positive, Fixed, Not affected).
Usable in: CVEs and security issues tables
Example scenario
Your security review focuses on actively triaged items, so you filter for the Focus status to see only the high-priority vulnerabilities your team has marked for immediate attention.
-
Severity
Severity is based on the CVSSv3 Base Score, which measures the inherent severity of a vulnerability regardless of your specific environment. Values are:
- CRITICAL – 9.0-10.0
- HIGH – 7.0-8.9
- MEDIUM – 4.0-6.9
- LOW – 0.1-3.9
- INFORMATIONAL – 0.0
Usable in: CVEs and security issues tables
Example scenario
Your security policy requires addressing CRITICAL and HIGH severity vulnerabilities within 30 days, so you filter for them to make sure you can take care of the vulnerabilities in time.
-
Exploit maturity
Exploit Maturity indicates whether working exploit code exists and how readily available it is. This helps prioritize vulnerabilities that attackers can exploit immediately. Values are:
- HIGH – Functional autonomous code exists, or no exploit is required
- FUNCTIONAL – Functional exploit code is available
- PROOF_OF_CONCEPT – Proof-of-concept exploit code is available
- UNPROVEN – No exploit code is available, or an exploit is theoretical
- NOT_DEFINED – No information available
Usable in: CVEs table
Example scenario
You want to prioritize vulnerabilities where attackers already have working exploit code, so you filter for FUNCTIONAL and HIGH exploit maturity.
Filtering Tutorial
This tutorial walks you through filtering CVEs to show only those that have a higher severity and affect your firmware.
Scenario:
Your company's security team has requested: "We want to focus on exploitable vulnerabilities that have a CRITICAL or HIGH severity rating. Hide everything else."
Prerequisites:
- Access to firmware analyses.
- Basic familiarity with the CVE analysis interface.
First, let's upload a firmware:
- Click Upload Firmware in the top-right corner.
- Fill in the firmware details. Vendor name and Product name are mandatory, the rest is optional.
- Wait for the analysis to complete.
Note
ONEKEY uses Automated Impact Assessment to automatically determine CVE relevance for specific firmware, so only applicable CVEs are displayed.
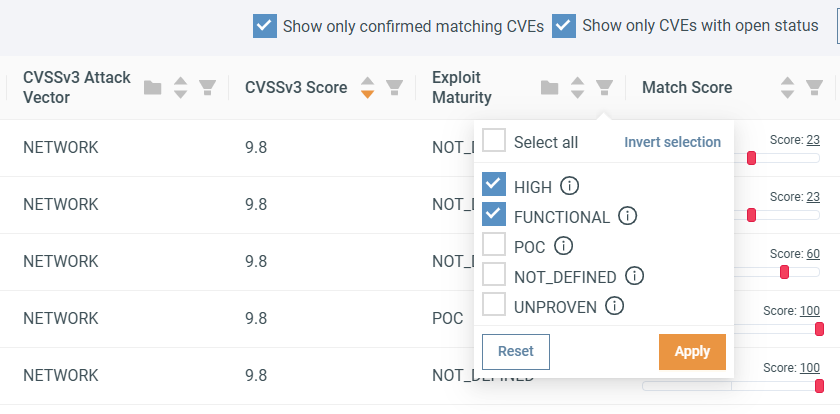
Next, filter by Exploit Maturity to show only exploitable CVEs. Click the icon in the Exploit Maturity header, select HIGH and FUNCTIONAL, then click Apply.
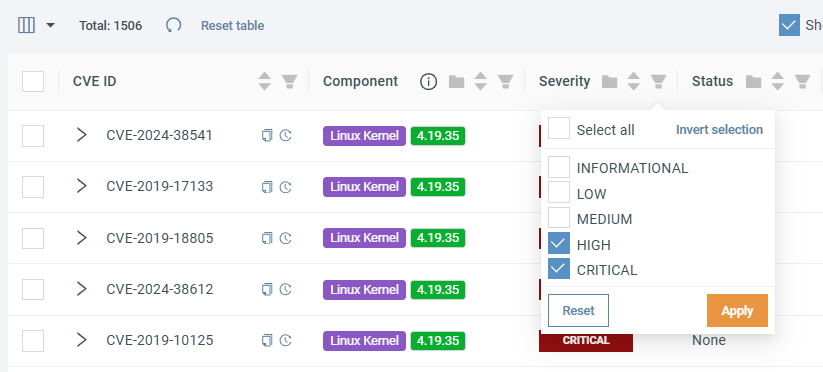
To filter for HIGH and CRITICAL CVEs let's click on the icon in the Severity header and select HIGH and CRITICAL, then click Apply.
With both filters applied, your CVE table displays only HIGH and CRITICAL severity vulnerabilities that are exploitable. All other CVEs are hidden from view.
Finally, you can save this filter configuration so you don't have to repeat this process. Click + Save current filters and give your filter a descriptive name.
Your filtered view is now ready for your security team's review process.
Advanced: Automate with Analysis Profile Rules
To go the extra mile, you can set up an Analysis Profile rule that automatically moves CVEs matching your filters into FOCUS status, making them even more prominent on the platform.
- Click Configuration in the top menu bar and select Analysis Profile.
- Make sure you're on the CVE rules tab.
-
In the FIRMWARE field, select your upload by entering this OQL query:
To select multiple firmware, you can use the
nameOQL field with theINoperator: -
In the QUERY field, enter the following to replicate the filters:
Breaking down the query
cve.severity IN (CRITICAL, HIGH)selects every CVE with CRITICAL or HIGH severity.ANDconnects the query conditions, so each must apply.cve.exploitMaturity IN (HIGH, FUNCTIONAL)selects CVEs with HIGH or FUNCTIONAL exploit maturity.score >= -2replicates Automated Impact Assessment, meaning only CVEs with a match score of -2 or higher are shown.
-
In the SET ACTION field, click ADD ACTION and select Status.
- The Status dropdown appears. Here select
FOCUS. - Test your rule by selecting the Rule menu and clicking Dry run.
- If the results look correct, click Save.
- Apply the rule by reanalyzing the affected firmware or by selecting them on the Firmwares page and clicking Apply analysis profile.